
Mushroom Head Interlocking Fasteners for School Craft Exhibitions
Oct 27, 2026
Reusable Mushroom Head Interlocking Fasteners for School Craft Exhibitions 2026: Selection Guide and Damage-Minimizing Removal Tips
Introduction
Preparing a school craft exhibition involves more than arranging handmade projects on display boards. Teachers, students, and craft club organizers also need practical ways to secure paper-cut artwork, origami, fabric decorations, clay ornaments, and lightweight 3D-printed models.
Traditional fastening methods can create problems during installation and removal. Packing tape may leave adhesive residue, thumbtacks can puncture delicate materials, and rigid plastic clips may leave pressure marks on lightweight projects. For exhibitions that last only a few hours or days, permanent mounting solutions may also be unnecessarily difficult to remove.
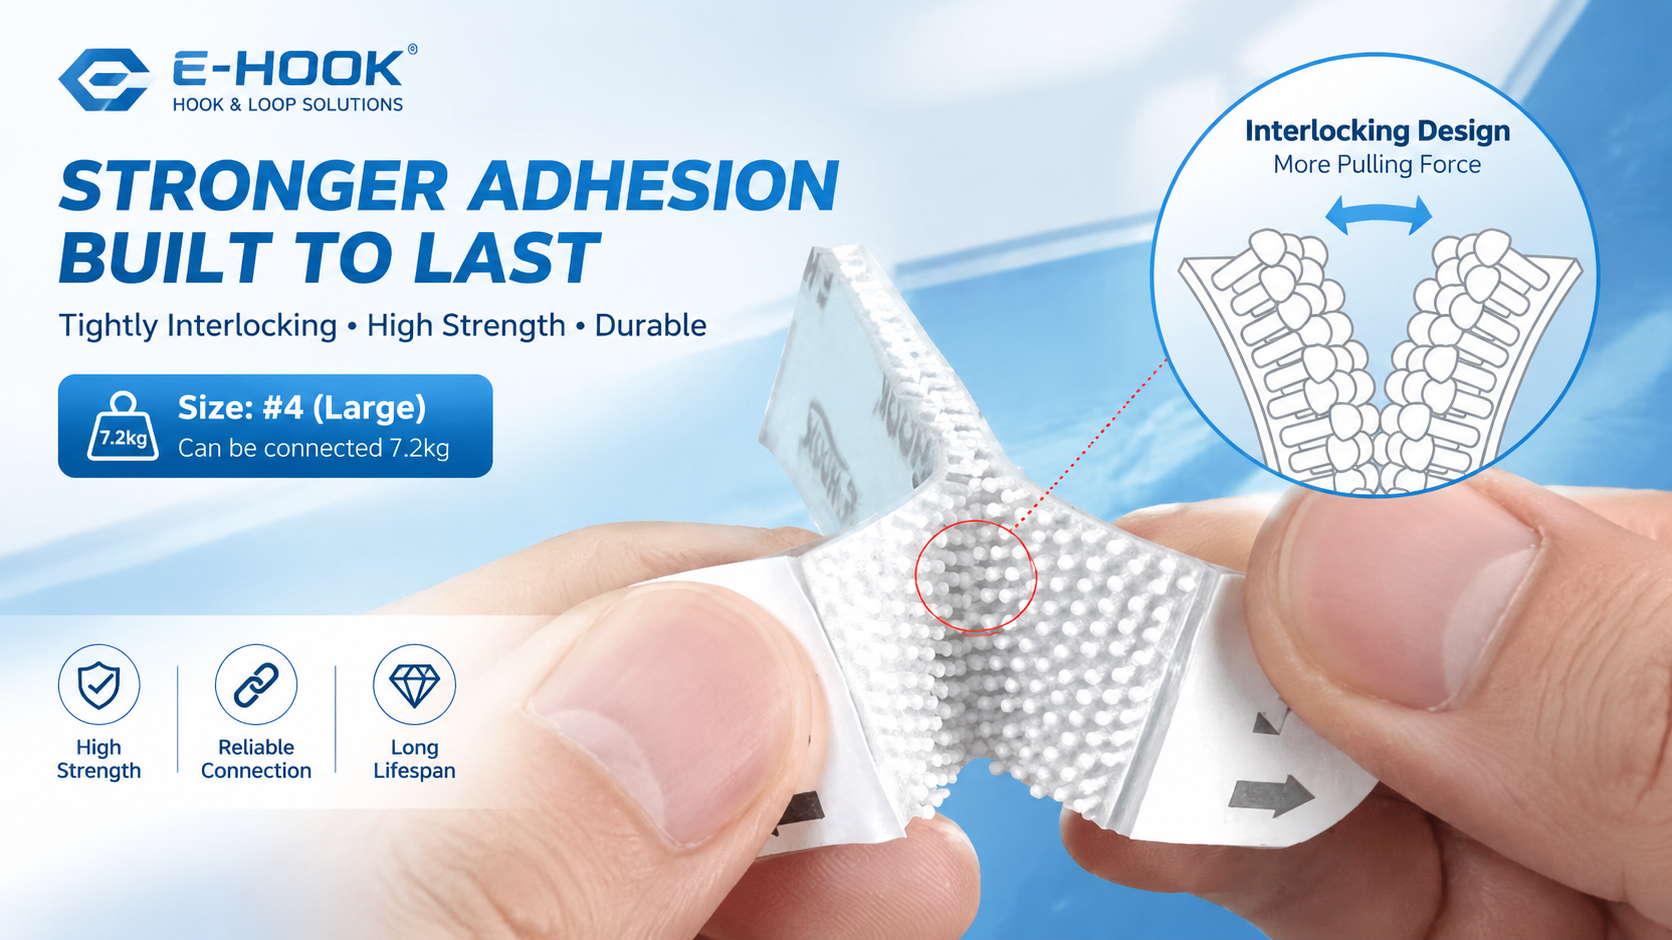
Reusable mushroom head interlocking fasteners offer an alternative for selected temporary mounting applications. Their specially shaped protrusions engage when pressed together, creating a mechanical connection that can be separated when the display needs to be repositioned or dismantled.
However, not every interlocking fastener is suitable for every craft material. Product structure, adhesive type, mounting surface, load requirements, and removal technique all affect the final result.
In this guide, we explain how to evaluate mushroom head interlocking fasteners for school craft exhibitions, match fastening configurations to different materials, prepare and test the installation, and remove the components carefully after the event.
E-HOOK, a product brand of Dongguan Jiehuan Electronic Technology Co., Ltd., offers fastening products for a range of applications. By understanding the available product structures and their limitations, exhibition organizers can make more informed choices for temporary displays and reusable mounting projects.
1. Understanding the Differences Between Craft Display and Industrial Fasteners
Industrial fastening products are often selected for holding performance, durability, environmental resistance, and secure attachment under defined operating conditions. These characteristics are important for manufacturing, equipment assembly, and other demanding applications.
School craft exhibitions have a different set of priorities. The displayed items may be lightweight, fragile, irregularly shaped, or decorated with coatings that can be damaged by adhesive contact or concentrated pressure.
For this reason, choosing a fastener based only on its maximum holding force is not always appropriate. Organizers should also consider how the product contacts the artwork, how it attaches to the display structure, and how it will be removed.
Three factors deserve particular attention.
1. Interlocking structure
The shape, density, and arrangement of the mushroom-shaped protrusions affect engagement and separation. Different products may have different fastening characteristics, so buyers should review the specifications for the exact model.
2. Backing and attachment method
Some fasteners use adhesive backing, while others are designed to be integrated into a fabric assembly or separate mounting structure. The backing method may be just as important as the interlocking mechanism when working with delicate artwork.
3. Intended application and load
A product suitable for a small paper decoration may not be appropriate for a heavy display panel. The supported load depends on the fastener, contact area, mounting orientation, substrate, adhesive, and installation quality.
Before selecting a product, ask the manufacturer for relevant performance data and confirm that it applies to the proposed application.
2. Material-Specific Selection Guide for School Craft Exhibitions
The best fastening method depends on the material, surface finish, weight, and mounting arrangement of each craft project. Before applying any fastener, determine whether the product will contact the finished artwork directly or attach to a separate backing structure.
The following recommendations provide a practical starting point for evaluating common school exhibition materials.
2.1 Paper Crafts: Paper Cutting, Quilling, and Origami
Paper-cut designs, layered quilling, and origami projects can be vulnerable to tearing, adhesive residue, and surface deformation.
For these items, consider mounting the artwork on a lightweight backing board and attaching the fastener to the board rather than directly to the paper. This arrangement can reduce direct contact between the adhesive and the artwork.
If an adhesive-backed mushroom head interlocking fastener is required, test it on a spare piece of the same paper. Check for changes in color, coating, surface texture, and fiber integrity after removal.
The suitability of a low-tack adhesive depends on the specific paper and adhesive formulation. A removable label or low-tack product should not automatically be assumed to leave no marks.
2.2 Fabric Crafts: Embroidery, Felt, and Woven Decorations
Fabric paintings, felt ornaments, embroidered pieces, and woven decorations can be damaged by snagging or concentrated pulling forces.
Where possible, attach the fastening component to a backing panel, fabric tab, or reinforced mounting area. Avoid placing the interlocking surface directly against loose threads or delicate embroidery.
For fabric-integrated solutions, review the attachment method and material compatibility. If the fabric is valuable or difficult to repair, test the complete assembly before using it in the exhibition.
2.3 Polymer Clay and Air-Dry Clay Projects
Polymer clay and air-dry clay decorations may have painted finishes, delicate projections, or uneven backs. Direct adhesive attachment may affect some coatings, while concentrated mechanical forces can crack fragile features.
Consider using a separate display stand, supporting base, or mounting component. If adhesive is necessary, confirm that it is compatible with both the clay and its surface finish.
Avoid embedding or pressing fastening components into clay unless the product and clay manufacturer's instructions specifically support that method.
2.4 Lightweight FDM 3D-Printed Models
FDM 3D-printed objects often have visible layer lines, textured surfaces, and varying wall thicknesses. These features can influence how a fastener contacts the model.
For lightweight models, consider attaching the fastener to a flat backing surface or a dedicated mounting point. Check whether the adhesive is compatible with the printed material and whether the contact area can support the intended load.
Do not assume that the protrusions of a mushroom head fastener will automatically engage with the layer lines of a 3D-printed object. The two structures may not be compatible.
2.5 Acrylic Display Stands and Lightweight Panels
Acrylic stands and lightweight display panels can provide convenient mounting surfaces, but compatibility depends on the finish, surface cleanliness, adhesive formulation, and applied load.
Before installation, check the manufacturer's instructions for the specific acrylic type and fastener. Test the assembly in the intended orientation, especially if the display will remain mounted for an extended period.
3. Step-by-Step Installation Guide for Craft Exhibitions
Step 1: Inspect the Artwork and Display Board
Before installation, inspect the artwork, its weight, its dimensions, and the condition of the display surface.
Identify fragile areas such as paper edges, painted details, embroidery, thin printed walls, and small decorative projections. Decide where the fastener can be placed without interfering with the appearance of the project.
Whenever practical, use a backing board or separate mounting component to keep the fastener away from delicate finished surfaces.
Step 2: Select the Appropriate Product Configuration
Choose the product according to the mounting surface, intended load, fastening area, and expected removal method.
For adhesive-backed products, review the adhesive specifications and substrate compatibility. For non-adhesive components, determine how they will be attached to the artwork or display structure.
If you are considering products described as dual lock fasteners, confirm the exact product construction and technical specifications. Similar terminology does not guarantee identical performance.
Step 3: Conduct a Compatibility Test
Before using the fastener on the finished artwork, test the proposed installation on a representative sample or an inconspicuous area where testing is appropriate.
Follow the manufacturer's instructions for surface preparation, application pressure, and waiting time. Inspect the test area after separation for adhesive residue, coating changes, surface deformation, or other damage.
A short test can identify some obvious compatibility problems, but it cannot guarantee that the same result will occur after prolonged placement or under different environmental conditions.
Step 4: Position and Engage the Fastener
Measure the intended mounting area and position the fastening components carefully. Keep them away from fragile edges and decorative details.
Align the two interlocking surfaces and press them together according to the product instructions. Make sure the intended engagement area is connected before loading the display.
Avoid applying excessive pressure to the artwork itself. For delicate projects, support the back of the item while installing the fastener.
Step 5: Check the Stability of the Complete Display
After installation, check whether the artwork remains stable in its intended position. Look for movement, uneven loading, adhesive lifting, or changes in the supporting structure.
Test the complete assembly rather than evaluating the interlocking material alone. The backing board, adhesive, display surface, and mounting orientation all contribute to the final result.
For overhead displays, heavier objects, or installations where a failure could cause injury, use a suitable rated mounting system and appropriate secondary support where necessary.
4. How to Remove Fasteners After the Exhibition
Careful removal is an important part of temporary display planning. Even a fastener that performs well during installation can damage an artwork if it is removed incorrectly.
1. Support the item before removal
Hold the artwork or display component securely before separating the fastener. This helps prevent the item from falling or bending unexpectedly.
2. Follow the recommended release method
Use the removal method specified by the manufacturer. Where the product permits peeling separation, gradual and controlled movement may help avoid sudden force transfer.
Do not assume that every interlocking fastener should be removed in the same way. Product construction and substrate sensitivity can affect the appropriate technique.
3. Avoid pulling directly on fragile surfaces
Do not pull on thin paper edges, embroidered threads, delicate projections, or painted sections. If the fastening component is attached to a separate backing board, remove or separate the mounting structure where practical.
4. Inspect the surface after removal
Check for residue, coating damage, discoloration, deformation, or other changes. If adhesive remains, follow the adhesive manufacturer's removal instructions and test any cleaning method before applying it to the finished artwork.
5. Clean and store reusable components
Inspect the interlocking surfaces for dust, deformation, or wear. Clean and store them according to the manufacturer's instructions.
Remember that the interlocking components may remain usable even when the original adhesive backing is no longer suitable for reuse. Reusing the mechanical fastening surface does not automatically mean that the entire adhesive-backed product can be safely reinstalled.
5. Budget-Friendly Fastening Strategies for School Craft Clubs
School clubs often need to manage exhibition costs carefully. Rather than choosing the cheapest product automatically, compare the total cost of the mounting solution with its suitability, ease of removal, and potential for reuse.
Plan the fastening quantity
List the items to be displayed and identify which ones need independent fastening points. Measure the mounting area and estimate the required quantity before ordering.
Use samples before buying in volume
Sample testing can help identify unsuitable adhesive types or fastening structures before a larger purchase. This is particularly useful when the exhibition includes several different materials.
Consider reusable mounting arrangements
Where appropriate, attach the fastener to a reusable backing board, frame, or mounting accessory. This can reduce the need to apply adhesive directly to every new artwork.
Compare the full purchase cost
When comparing suppliers, include product pricing, shipping, minimum order quantities, packaging, and any customization costs. A low unit price may not represent the lowest total cost for a small project.
Ask about small-batch orders
For limited school projects, ask suppliers whether they can provide samples or small quantities. Availability, pricing, and shipping terms should be confirmed directly rather than assumed.
Avoid improvised DIY methods that modify the shape of fastening components or combine incompatible adhesives. Such methods may produce unpredictable holding performance and can introduce additional damage or safety risks.
6. Why Consider E-HOOK for Mushroom Head Interlocking Fasteners?
E-HOOK is a product brand of Dongguan Jiehuan Electronic Technology Co., Ltd. The company provides fastening products for different application requirements, including solutions used in product assembly, mounting, and other fastening scenarios.
Its broader product range includes adhesive-backed hook and loop products, back-to-back hook and loop fasteners, PUR hot-pressed products, fastening straps, and injection-molded fastening components.
These products use different structures and attachment methods, so the most appropriate choice depends on the specific application rather than the product category alone.
For school craft exhibitions, buyers can discuss the following requirements with E-HOOK:
- Material compatibility: The type of paper, fabric, clay, acrylic, or printed material involved.
- Mounting method: Whether the product should use adhesive backing or attach to a separate support.
- Dimensions: The required fastening area and available installation space.
- Performance requirements: The intended load, fastening direction, and expected usage conditions.
- Reuse expectations: Whether the interlocking components, adhesive backing, or complete assembly needs to be reusable.
- Order quantity: Whether samples, small batches, or customized configurations are required.
Providing this information helps establish a clearer basis for product selection and sample evaluation.
For distributors, retailers, and other B2B buyers, E-HOOK can also be considered when comparing fastening structures, exploring customization options, and planning repeat orders.
Before publishing specific claims about product performance, environmental compliance, certifications, or testing results, verify the relevant documentation for the exact product and manufacturing entity.
7. Frequently Asked Questions
Q1: Can mushroom head interlocking fasteners be used for lightweight acrylic display stands?
Some configurations may be suitable for compatible acrylic surfaces, but the result depends on the adhesive, acrylic finish, contact area, and intended load. Check the manufacturer's specifications and test the complete assembly before use.
Do not assume that every adhesive-backed product can be removed without residue from every acrylic surface.
Q2: How many times can a reusable mushroom head interlocking fastener be used?
The number of reuse cycles varies by product design, materials, operating conditions, contamination, and wear. Adhesive-backed products may also lose their bonding performance even when the interlocking surfaces remain functional.
Ask the manufacturer for cycle-test data for the exact model and review the conditions under which it was measured.
Q3: Are these fasteners suitable for children's craft projects?
Suitability depends on the specific product, its materials, its intended use, and the relevant safety requirements. Review applicable product documentation and keep small components away from young children when they could present a choking hazard.
Do not treat an industrial product as suitable for children's use solely because it is intended for temporary mounting.
Q4: Can mushroom head interlocking fasteners be cut into smaller sizes?
Some products may be cut to size, but this depends on their construction and the manufacturer's instructions. Cutting can affect the fastening area, edge condition, and overall performance.
Confirm that cutting is permitted for the selected product and test the modified component before relying on it for a display.
Q5: What is the difference between mushroom head interlocking fasteners and dual lock fasteners?
These terms can be used in discussions of similar interlocking fastening technologies, but they do not necessarily identify identical products. Differences in construction, material, dimensions, and performance may affect suitability for a particular application.
Review the actual product specifications and confirm the intended use with the supplier before purchasing.
Conclusion
A successful school craft exhibition requires more than an attractive layout. The fastening method must also suit the artwork, support the intended load, and allow practical removal after the event.
Reusable mushroom head interlocking fasteners can be useful for selected temporary mounting applications, but product selection should always account for material compatibility, adhesive behavior, fastening area, and the condition of the supporting surface.
Before installation, inspect the artwork, test the proposed fastening arrangement, and verify the product specifications. During removal, support the item and follow the manufacturer's recommended method. Afterward, inspect and store reusable components according to the relevant instructions.
For school clubs, exhibition organizers, retailers, and distributors, E-HOOK provides a starting point for exploring fastening products and discussing application-specific requirements with a supplier.
By combining careful product selection with practical testing, you can create a more organized display, reduce avoidable damage, and make future exhibition setup and teardown easier to manage.